Table of Contents
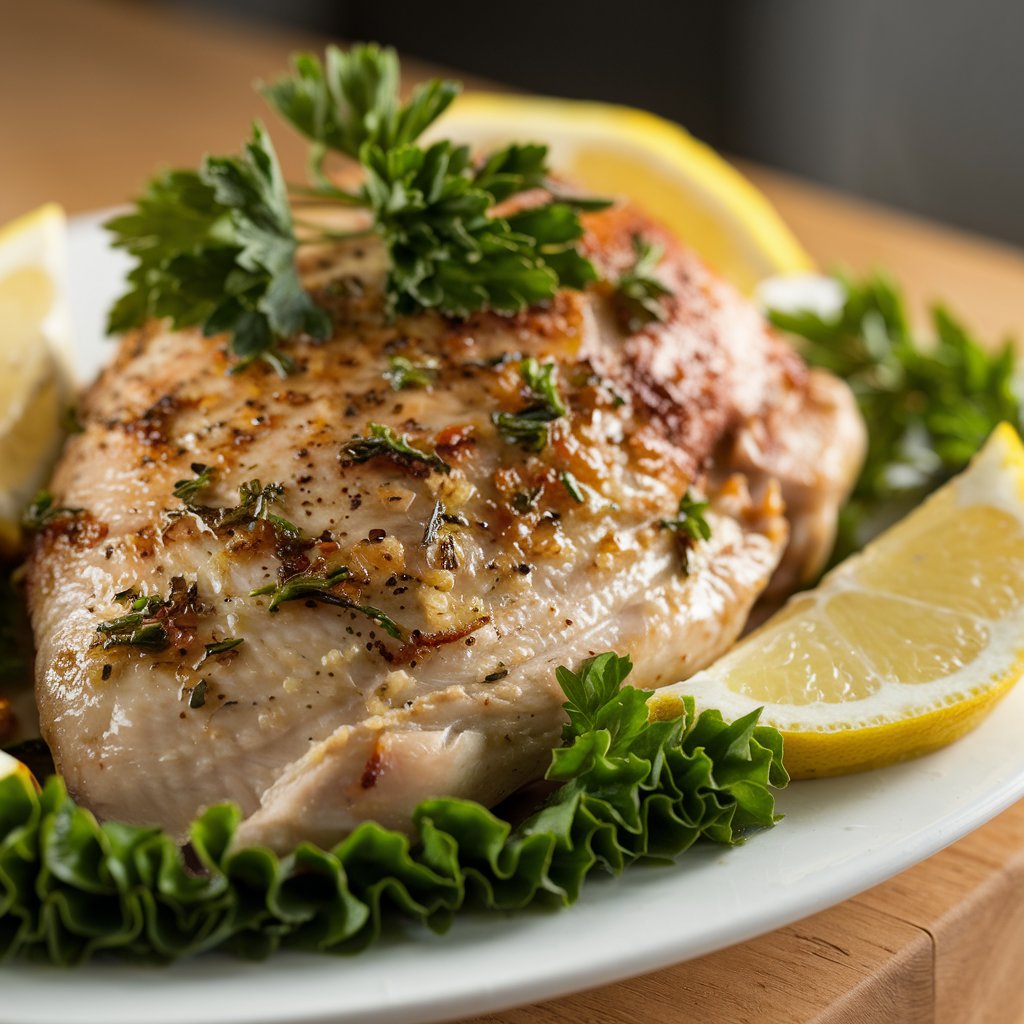
If you’re wondering how long to bake thin cut chicken breast, the answer depends on achieving the perfect balance of time and temperature. Thin chicken breasts typically require less baking time, making them a quick and convenient dinner option. To bake thin cut chicken breast, preheat your oven to 400°F and cook for about 15-20 minutes, or until the internal temperature reaches 165°F. Knowing how long to bake thin cut chicken breast ensures your chicken stays tender and juicy without drying out. Moreover, this method works great for meal prep or a quick, healthy dinner. Therefore, if you want consistently delicious results, follow these simple steps for baking thin cut chicken breast to perfection.
Baking chicken may seem simple, but when it comes to thin-cut chicken breast, getting it right can be a challenge. How long should you bake it? What temperature works best? Whether you’re preparing a quick weeknight dinner or planning a meal prep session, mastering the art of baking thin-cut chicken breast is essential for juicy, flavorful results every time.
In this guide, I’ll walk you through every step, from prep to bake, to ensure you never end up with dry or flavorless chicken. Ready to become a chicken-baking pro? Let’s dive in! 🐔🔥
Why Choose Thin-Cut Chicken Breast?
- Thin Chicken Breast Recipes
- How Long to Bake Thin Chicken Breast
- Outback Steakhouse Chicken Recipe
- How to Brine Chicken
Benefits of Using Thin-Cut Chicken Breast
Thin-cut chicken breasts are a game-changer in the kitchen. Here’s why:
- Faster Cooking: They cook quickly, perfect for busy weeknights.
- Even Cooking: No more guessing if the thick center is cooked through.
- Versatility: Works for countless recipes, from salads to casseroles.
- Portion Control: A healthier choice, keeping calories in check.
Plus, who doesn’t love a quick, no-fuss protein option?
Popular Dishes Made with Thin-Cut Chicken Breast
Here are a few popular dishes where thin-cut chicken breasts shine:
- Chicken Piccata: A tangy, buttery favorite.
- Grilled Chicken Salad: Light, refreshing, and filling.
- Chicken Parmesan: Breaded, baked, and cheesy.
If you’re into experimenting, thin-cut chicken is versatile enough to handle bold flavors and creative pairings. ✨
Preparing Thin-Cut Chicken Breast for Baking
H3: Choosing the Right Ingredients
A great dish starts with fresh ingredients. When buying chicken, look for:
- Bright, pinkish color: Freshness is key.
- Even thickness: For consistent cooking.
Make sure your spices and herbs are fresh, too!
How to Season Thin-Cut Chicken Breast Perfectly
Seasoning is the heart of flavor. For thin-cut chicken, use:
- Basic Seasoning: Salt, pepper, garlic powder.
- Herb Blends: Try Italian seasoning or Cajun spice for a kick.
- Pro Tip: Rub olive oil on the chicken before adding seasoning to help it stick and create a golden finish.
“A well-seasoned chicken breast is like a blank canvas for your favorite meals!”
Should You Marinate? Pros and Cons
Marinating can add flavor but requires extra time.
Pros:
- Deepens flavor.
- Helps tenderize.
Cons:
- Adds extra prep time.
- Not always necessary with quality cuts.
For a quick option, try a 20-minute marinade with lemon juice, garlic, and olive oil. 🍋🧄
Baking Thin-Cut Chicken Breast: The Basics
The Ideal Baking Temperature
The sweet spot is 375°F (190°C). This ensures your chicken cooks evenly without drying out.
Here’s a handy tip: Preheat your oven for at least 10 minutes before baking to ensure consistency.
Cooking Time for Thin-Cut Chicken Breast
Typically, thin-cut chicken breasts bake for 15-20 minutes at 375°F.
- Pro Tip: Check for doneness with a meat thermometer. The internal temperature should reach 165°F (74°C).
Oven vs. Air Fryer: Which is Better?
If you’re wondering whether to bake or air fry, consider this:
- Oven: Great for even cooking and larger batches.
- Air Fryer: Faster cooking and crispier edges.
Choose based on your time and texture preferences!
“The air fryer is like a magic wand for crispy chicken in half the time! ✨”

Common Problems and Solutions When Baking Chicken Breast
Baking thin-cut chicken breast seems straightforward, but even seasoned cooks encounter challenges. Let’s tackle the most common issues and how to fix them.
Preventing Dry Chicken
Dry chicken is the nemesis of every home cook. Thin cuts bake quickly, making them prone to overcooking. To avoid this:
- Use a Meat Thermometer: Check the internal temperature—165°F (74°C) is the magic number.
- Cover with Foil: Baking under foil helps retain moisture, especially for lean chicken.
- Brine Your Chicken: A simple brine of salt and water (1 hour) adds extra moisture.
“Think of brining as giving your chicken a pre-cooking spa day—hydrated and relaxed!”
Achieving Even Cooking
Ever pulled a dish from the oven only to find half of it undercooked? Uneven cooking can happen when cuts are inconsistent or the oven isn’t preheated. Here’s what to do:
- Ensure Uniform Thickness: Pound the chicken to an even size before baking.
- Preheat Your Oven: Start with a hot oven for consistent heat distribution.
- Arrange Evenly on the Tray: Keep pieces spaced apart for proper airflow.
Avoiding Undercooking or Overcooking
Undercooked chicken is unsafe, while overcooked chicken is tough and chewy. To find that perfect balance:
- Check Early and Often: Begin checking at the 12-minute mark.
- Follow Time Guidelines: Thin-cut breasts usually need 15-20 minutes at 375°F.
- Rest the Chicken: Let it rest for 5 minutes post-baking to lock in juices.
Tips for the Perfect Thin-Cut Chicken Breast
Using a Meat Thermometer for Accuracy
A meat thermometer is your best friend for precision. Insert it into the thickest part of the chicken for an accurate reading.
- Pro Tip: Choose a digital thermometer for quicker results and ease of use.
Resting the Chicken After Baking
Resting might seem like an unnecessary step, but it’s crucial. After baking, let your chicken sit for 5 minutes before cutting into it. This allows the juices to redistribute, giving you tender, flavorful meat.
Adding Flavorful Toppings After Cooking
Want to elevate your chicken? Post-baking toppings can take your meal from good to great:
- Fresh Herbs: Parsley, cilantro, or basil for a vibrant finish.
- Cheese: Sprinkle parmesan or mozzarella during the last minute of baking for a gooey topping.
- Sauces: Drizzle with pesto, BBQ sauce, or garlic butter for an extra flavor punch.

Health Benefits of Thin-Cut Chicken Breast
Beyond its deliciousness, thin-cut chicken breast offers a host of health benefits, making it a go-to protein for many.
Nutritional Advantages
Chicken breast is rich in lean protein, low in fat, and packed with essential nutrients.
- Protein Powerhouse: Supports muscle growth and repair.
- Low Calorie: Perfect for weight-conscious eaters.
- Vitamin-Rich: Contains B vitamins, essential for energy and metabolism.
Comparing Chicken Breast to Other Proteins
How does chicken breast stack up against other protein options?
- Chicken vs. Beef: Chicken is lower in fat and calories, making it a healthier choice for heart health.
- Chicken vs. Fish: Both are lean, but chicken is more versatile for baking.
“Think of thin-cut chicken breast as your all-purpose protein—adaptable, healthy, and oh-so-tasty!”
Baking Thin-Cut Chicken Breast: Additional Tips
Here are some extra tips to ensure baking success:
- Line Your Tray: Use parchment paper for easy cleanup.
- Don’t Skip the Oil: A light coating of olive oil prevents sticking and adds a golden finish.
- Experiment with Spices: Try smoked paprika, turmeric, or cumin for unique flavor profiles.
FAQs About Baking Thin-Cut Chicken Breast
To wrap things up, let’s address some frequently asked questions. These are common queries from home cooks just like you, and the answers will ensure you’re fully prepared to bake the perfect chicken breast every time.
Can You Bake Frozen Thin-Cut Chicken Breast?
Yes, you can bake thin-cut chicken breast straight from frozen, but it requires a few adjustments:
- Increase Cooking Time: Frozen chicken will need about 25-30 minutes at 375°F (190°C).
- Use a Meat Thermometer: Ensure the internal temperature reaches 165°F (74°C).
- Cover with Foil: This helps retain moisture as it cooks longer.
Pro Tip: For best results, thaw your chicken in the fridge overnight. This ensures even cooking and better texture.
How Do You Know When It’s Done?
The simplest way to know if your chicken is done is by using a meat thermometer. Insert it into the thickest part of the meat. If it reads 165°F (74°C), it’s fully cooked.
Other signs of doneness:
- The juices run clear (no pink!).
- The chicken is firm to the touch but not rubbery.
Is Baked Chicken Breast Healthier Than Fried?
Absolutely! Baking uses minimal oil, making it a healthier cooking method. Here’s why:
- Lower Fat Content: Fried chicken absorbs oil, increasing fat and calories.
- Retains Nutrients: Baking keeps the nutritional profile of the chicken intact.
If you’re craving a crispy texture, try coating the chicken in breadcrumbs and baking it at a high temperature or using an air fryer for a healthier twist! 🍗✨
Advanced Techniques for Perfect Results
Want to take your thin-cut chicken breast to the next level? These advanced tips and techniques will help you master the art of baking like a pro.
Brining for Extra Juiciness
If you have a little extra time, brining is an excellent way to add moisture and flavor to your chicken.
How to Brine Thin-Cut Chicken Breasts:
- Dissolve 3 tablespoons of salt in 4 cups of water.
- Add chicken breasts and let them soak for 30 minutes to 1 hour.
- Rinse and pat dry before seasoning and baking.
“Think of brining as a flavor booster—it’s like marinating on steroids!”
Try a Two-Step Cooking Method
This technique ensures your chicken is both tender and golden brown:
- Sear First: Quickly sear the chicken in a hot skillet for 1-2 minutes per side.
- Bake: Transfer to the oven to finish cooking at 375°F (190°C).
This method locks in the juices while giving the chicken a lovely crust.
Make-Ahead Meal Prep
Thin-cut chicken breasts are perfect for meal prep. Bake a batch at the beginning of the week and use them in different dishes:
- Salads: Dice and toss with greens, nuts, and vinaigrette.
- Wraps: Pair with hummus, veggies, and a whole-grain wrap.
- Pasta: Add to a creamy Alfredo or tomato-based pasta.
Conclusion
Baking thin-cut chicken breast doesn’t have to be complicated. With the right preparation, techniques, and timing, you can create juicy, flavorful chicken every time. Whether you’re making a quick dinner or meal prepping for the week, mastering this skill will elevate your cooking game.
Here’s a quick recap:
- Preheat your oven and bake at 375°F for 15-20 minutes.
- Use a meat thermometer to check for doneness (165°F).
- Experiment with seasonings, toppings, and sides for endless possibilities.
So, what are you waiting for? Grab those thin-cut chicken breasts, fire up your oven, and let your culinary creativity shine! 🌟🐔”

