
Table of Contents
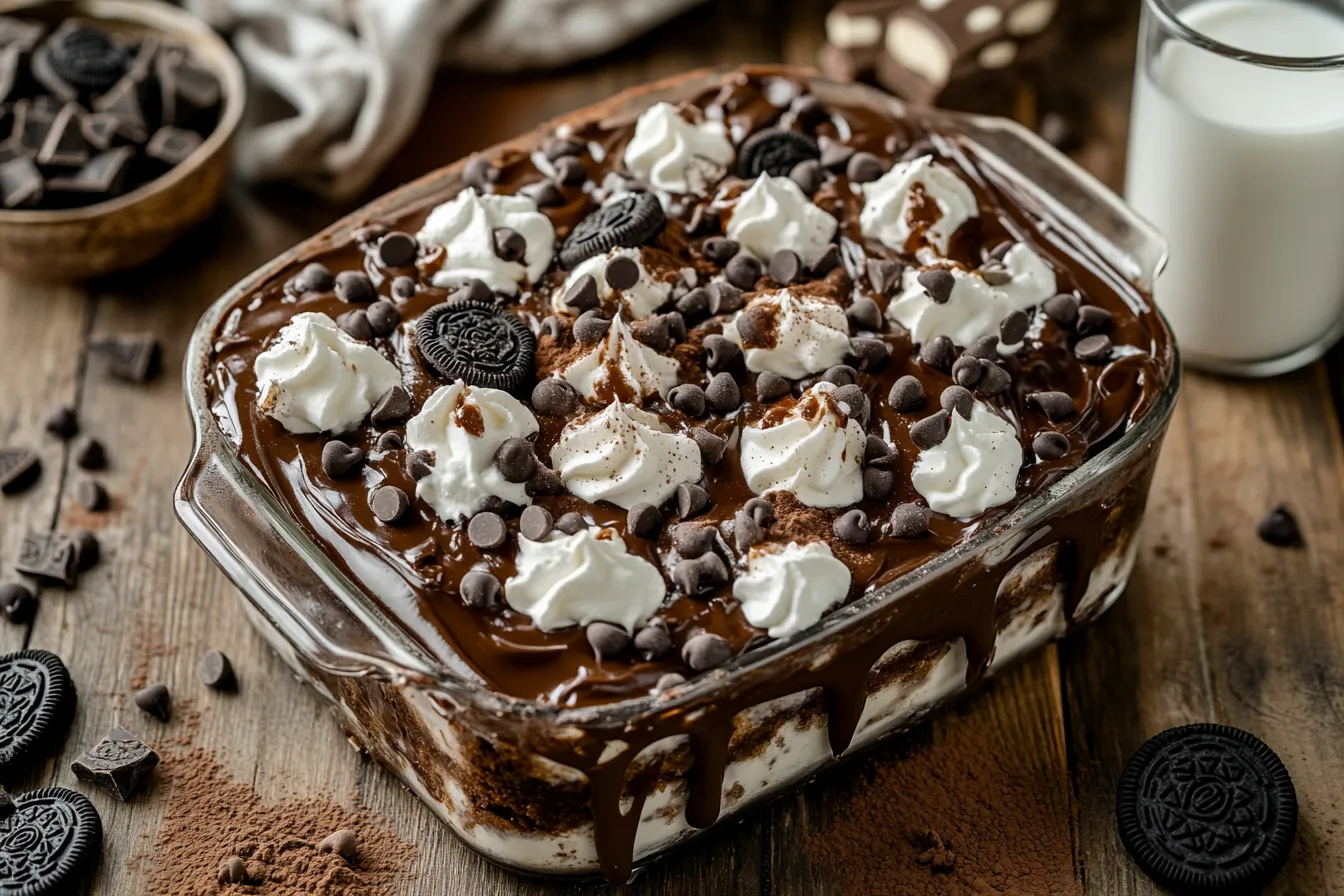
Okay, let’s talk chocolate. Not just any chocolate, but the kind of deep, rich, all-consuming chocolate experience that makes your eyes roll back in pure bliss. Imagine a cake so intensely chocolatey, so moist, so packed with different textures and flavors that it feels like a party in your mouth. Sounds amazing, right? 😉 Well, get ready because we’re diving headfirst into the glorious, decadent world of the Death by Chocolate Poke Cake Explosion! 💥
This isn’t just a recipe; it’s an event. It’s the kind of dessert you make when you want to seriously impress someone, celebrate something special, or simply treat yourself to the ultimate chocolate fantasy. Forget subtle hints of cocoa – we’re talking a full-on chocolate assault, a delightful overload for your senses. It combines the moist, infused magic of a poke cake with layers upon layers of chocolate goodness. Curious? Intrigued? Maybe a little scared? Don’t worry, I’ll guide you through every step, from gathering your chocolate arsenal to dodging potential baking pitfalls. Prepare yourself for a journey into pure chocolate nirvana! 🍫✨
What Exactly is a Poke Cake Anyway? A Sweet Foundation
Before we dive into the “Death by Chocolate” part, let’s quickly cover the basics. What in the world is a poke cake? If you’ve never encountered one, you’re in for a treat! The concept is actually brilliantly simple, yet incredibly effective.
Imagine a freshly baked cake, still warm from the oven. Now, picture taking the handle of a wooden spoon (or something similar) and gently poking holes all over the top surface. It might feel a bit weird at first, like you’re vandalizing your beautiful cake, but trust the process! These holes are the secret passageways to ultimate moistness and flavor infusion..Chocolate Chip Cookie Recipe
Once your cake is sufficiently holey (is that a word? It is now!), you pour a liquid filling over the top. This could be anything from pudding or Jell-O (in classic versions) to sauces, purees, or, in our case, glorious melted chocolate or chocolate pudding mixtures. The liquid seeps down into those holes, permeating the cake crumb, making it incredibly tender, moist, and infused with whatever delicious filling you’ve chosen. It’s like the cake becomes a super-absorbent sponge, soaking up all that extra flavor. Genius, right? It transforms a potentially standard cake into something extraordinary.
Unpacking the “Death by Chocolate” Promise: More Than Just Cocoa
Now, why “Death by Chocolate”? This isn’t meant to be taken literally, of course (unless you count dying and going to chocolate heaven! 😉). The name signifies intensity. It promises an experience that goes beyond a simple chocolate cake. We’re talking multiple forms of chocolate working together in harmony to create something truly unforgettable.
“Anything is good if it’s made of chocolate.” – Jo Brand
And this cake takes that sentiment to heart! It’s not just about using cocoa powder in the batter. Oh no, we’re aiming higher, deeper, chocolatier.
Layers of Chocolate: Why This Isn’t Your Average Cake
Think about it:
- The Cake Itself: We start with a rich, deeply flavored chocolate cake base. We’re not skimping here think dark cocoa powder for intensity or even melted bittersweet chocolate swirled into the batter for extra fudginess.
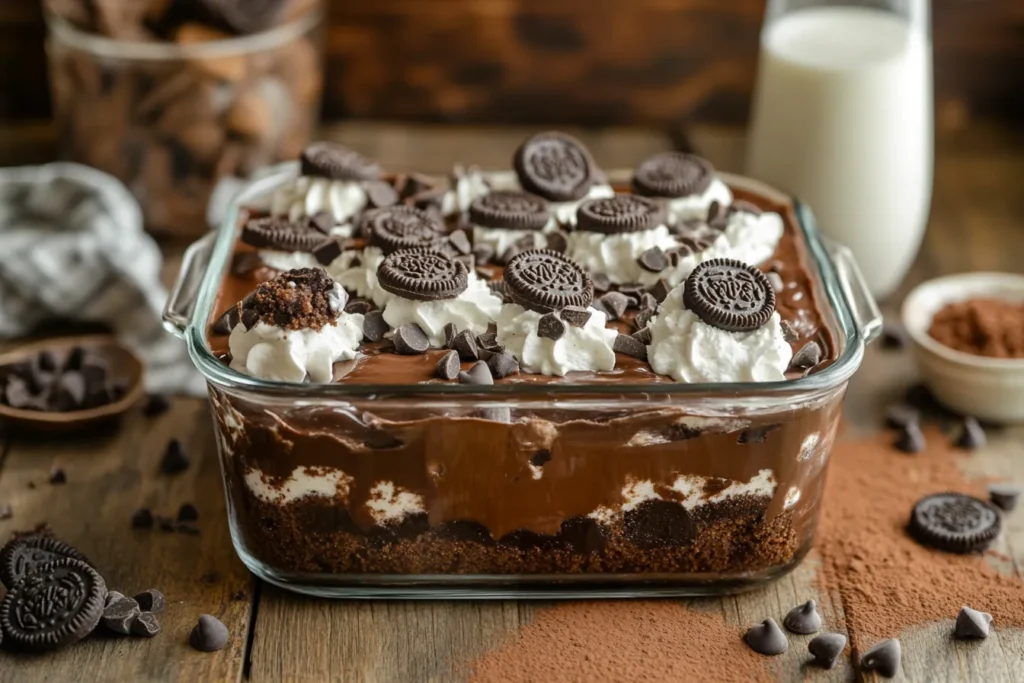
- The Filling: This is where the poke cake magic happens, infused with more chocolate! Often, this involves a decadent chocolate pudding, a smooth ganache, or perhaps a sweetened condensed milk and chocolate sauce concoction that seeps into every nook and cranny.
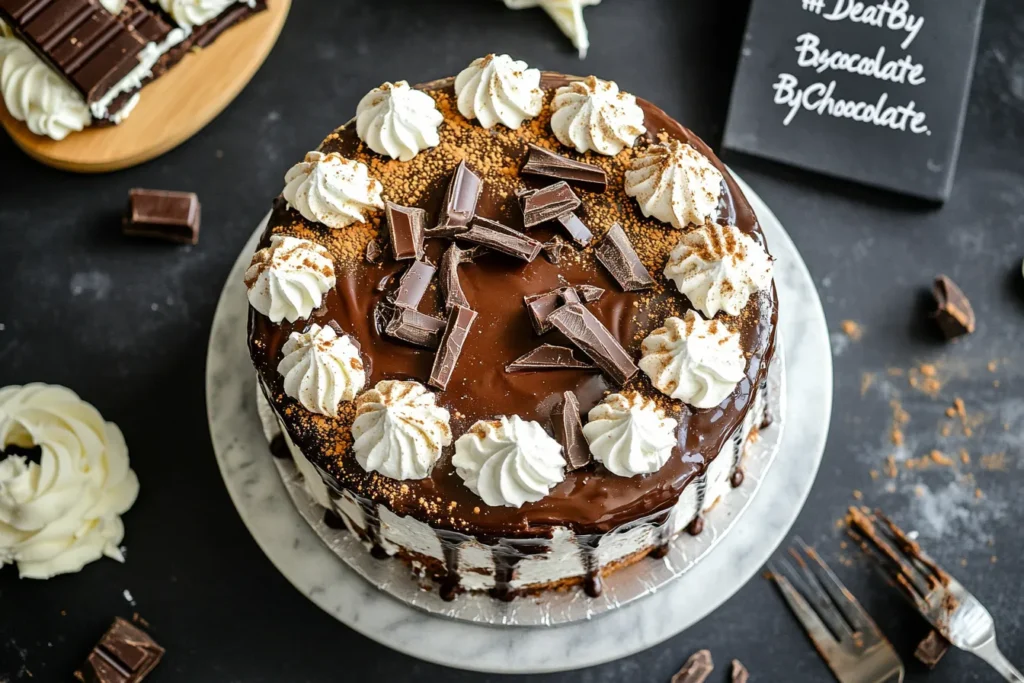
- The Frosting: As if the first two layers weren’t enough, we crown this masterpiece with a luscious chocolate frosting. This could be a fluffy buttercream, a silky smooth ganache, or a rich cream cheese frosting all delivering another hit of chocolate.
- The Toppings: The final flourish! Think chocolate chips (milk, dark, white, or a mix!), chocolate sprinkles, chocolate shavings, crumbled chocolate cookies, or even chopped pieces of your favorite chocolate bar. It’s the cherry or rather, the chocolate curl on top!
See? It’s a multi-layered chocolate attack, designed for maximum impact. Each layer contributes a different texture and a slightly different chocolate note, creating a complex and deeply satisfying experience.
The “Explosion” Factor: Brace Yourself for Flavor Overload
So, we have the “Death by Chocolate” intensity, but what about the “Explosion”? This part of the name speaks to the overall sensory experience. It’s not just rich; it’s abundant. It’s the feeling of sheer indulgence when you take that first bite…Making German Chocolate Poke Cake
The “explosion” comes from:
- Flavor Intensity: The combined power of all those chocolate layers hitting your taste buds at once.
- Moisture Overload: The poke filling ensures the cake is incredibly moist, almost melting in your mouth.
- Textural Contrast: The interplay between the soft cake, the gooey filling, the smooth frosting, and any crunchy toppings.
Texture Tango: Moist Cake, Gooey Filling, Rich Frosting
Imagine sinking your fork through the cloud-like frosting, feeling it glide through the tender, moist cake crumb, and then hitting pockets of that dense, luscious filling. That’s the texture tango! 💃🕺 The “explosion” is that moment when all these elements combine in your mouth – the yielding softness of the cake, the smooth richness of the filling soaking into it, the creamy sweetness of the frosting, and perhaps a little crunch from the toppings. It’s a symphony of textures that makes each bite exciting and prevents the richness from becoming monotonous. It’s this dynamic combination that truly makes the cake feel like an “explosion” of deliciousness.

Your Chocolate Mission: Gathering the Essential Supplies
Alright, are you ready to embark on this chocolate quest? Like any good mission, preparation is key! Let’s gather the troops – I mean, ingredients. We’ll break it down by component. Remember, quality ingredients often lead to a better final product, especially when chocolate is the star! 🌟
The Cake Base Brigade: Choosing Your Chocolate Foundation
This is the bedrock of our explosion. You have a couple of main options here:
- The Trusty Box Mix: Let’s be real, sometimes life calls for shortcuts! A good quality chocolate cake mix (especially one labeled “dark chocolate,” “devil’s food,” or “fudge cake”) can be a fantastic starting point. Look for mixes that promise extra moistness. You can often enhance a box mix by using melted butter instead of oil, milk instead of water, or adding an extra egg yolk.
- The From-Scratch Adventure: For the purists or those wanting ultimate control over the flavor, a scratch-made cake is the way to go. You’ll typically need standard cake ingredients like flour, sugar, eggs, butter or oil, and leavening agents (baking soda/powder). The crucial element here is the chocolate component. Using good quality unsweetened cocoa powder (Dutch-process often gives a darker color and smoother flavor) is essential. Some recipes even call for melted unsweetened or bittersweet chocolate in the batter for extra richness.
Whichever route you choose, aim for a cake that’s sturdy enough to withstand poking and filling but moist enough to be delicious!
Liquid Gold: Crafting the Perfect Chocolate Poke Filling
This is where the magic truly seeps in. The goal is a liquid that’s thin enough to soak into the holes but rich and flavorful enough to make a difference. Common choices include:
- Chocolate Pudding: Instant or cook-and-serve chocolate pudding prepared according to package directions (sometimes with slightly less milk to make it richer) is a classic and easy option.
- Sweetened Condensed Milk + Chocolate: A can of sweetened condensed milk gently heated with chocolate chips or cocoa powder until smooth creates an incredibly rich, fudgy filling. A splash of milk or cream might be needed to get the right consistency.
- Chocolate Sauce/Syrup: A good quality store-bought or homemade chocolate sauce can work wonders.
- Chocolate Ganache (Thinned): A simple mixture of heated heavy cream poured over chopped chocolate, stirred until smooth. You might need to thin it slightly with more warm cream or milk to make it pourable enough for soaking…Red Velvet Cake Recipe
The key is intense chocolate flavor and a consistency that flows easily into the poked holes.
Crowning Glory: Frosting and Toppings That Wow
This is the final layer of decadence!
- Frosting:
- Chocolate Buttercream: Classic, fluffy, and sweet. Easily made with butter, powdered sugar, cocoa powder, and a splash of milk or cream.
- Chocolate Cream Cheese Frosting: Adds a slight tang to balance the sweetness. Blend cream cheese, butter, powdered sugar, and cocoa powder.
- Whipped Ganache: Chill a basic ganache until firm, then whip it with an electric mixer until light and fluffy. Incredibly luxurious!
- Whipped Cream/Cool Whip: For a lighter (relatively speaking!) finish, sweetened whipped cream or stabilized whipped topping like Cool Whip provides a nice contrast. You can fold in cocoa powder or melted chocolate for flavor.
- Toppings: Go wild!
- Chocolate Chips (mini or regular, various flavors)
- Chocolate Sprinkles/Jimmies
- Chocolate Shavings (use a vegetable peeler on a bar of chocolate)
- Crushed Chocolate Cookies (like Oreos)
- Chopped Candy Bars (Heath, Snickers, Reese’s – be creative!)
- A Drizzle of Caramel or More Chocolate Sauce
Here’s a sample table with potential ingredients and approximate quantities for a standard 9×13 inch cake. Remember, these are just guidelines – feel free to adapt based on your specific recipe choice!
| Component | Ingredient | Quantity (Approx.) | Notes |
|---|---|---|---|
| Cake Base | Chocolate Cake Mix | 1 box (e.g., 15.25 oz) | Or ingredients for your favorite scratch recipe |
| Ingredients on Mix Box | As listed | (Eggs, Oil/Butter, Water/Milk) | |
| Poke Filling | Sweetened Condensed Milk | 1 can (14 oz) | The base of richness |
| Chocolate Chips | 1 cup | Semisweet or dark recommended | |
| Milk or Cream | 2-4 tbsp | To adjust consistency if needed | |
| Frosting | Butter, softened | 1 cup (2 sticks) | For a buttercream base |
| Powdered Sugar | 3-4 cups | Sifted | |
| Unsweetened Cocoa Powder | 1/2 cup | Dutch-process preferred | |
| Milk or Cream | 3-5 tbsp | For desired frosting consistency | |
| Vanilla Extract | 1 tsp | Enhances flavor | |
| Toppings | Mini Chocolate Chips | 1/2 cup | Or any combination of toppings listed above |
| Chocolate Sprinkles | 1/4 cup | For visual appeal and texture |
The Baking Battlefield: Step-by-Step to Chocolate Victory
Alright, aprons on? Ovens preheating? Let’s conquer this Death by Chocolate Poke Cake Explosion! Follow these steps, and you’ll be well on your way to chocolate glory. Remember, baking should be fun, so crank up some tunes and let’s do this! 🎶
Step 1: Mixing and Baking the Chocolate Canvas
First things first, we need our cake base.
- If using a box mix: Prepare the batter according to the package directions, perhaps using those little enhancement tricks we talked about (like using milk instead of water or adding an extra egg yolk for richness). Pour the batter into a greased and floured 9×13 inch baking pan. Spread it evenly.
- If baking from scratch: Follow your chosen recipe carefully. Mix your dry ingredients, combine your wet ingredients, and then bring them together without overmixing (overmixing can make the cake tough – we want tender!). Pour your beautiful scratch batter into the prepared 9×13 inch pan.
Baking Time! Pop that pan into your preheated oven. Baking times will vary depending on your oven and the recipe (box mix or scratch), but generally, a 9×13 cake takes around 30-40 minutes. How do you know when it’s done? The classic toothpick test is your friend! Insert a toothpick into the center of the cake. If it comes out clean (or with a few moist crumbs, but no wet batter), it’s ready! You can also gently press the top; it should spring back lightly. Let the cake cool in the pan on a wire rack for about 15-20 minutes. It needs to be cool enough to handle but still warm for the next step. Don’t let it cool completely just yet!
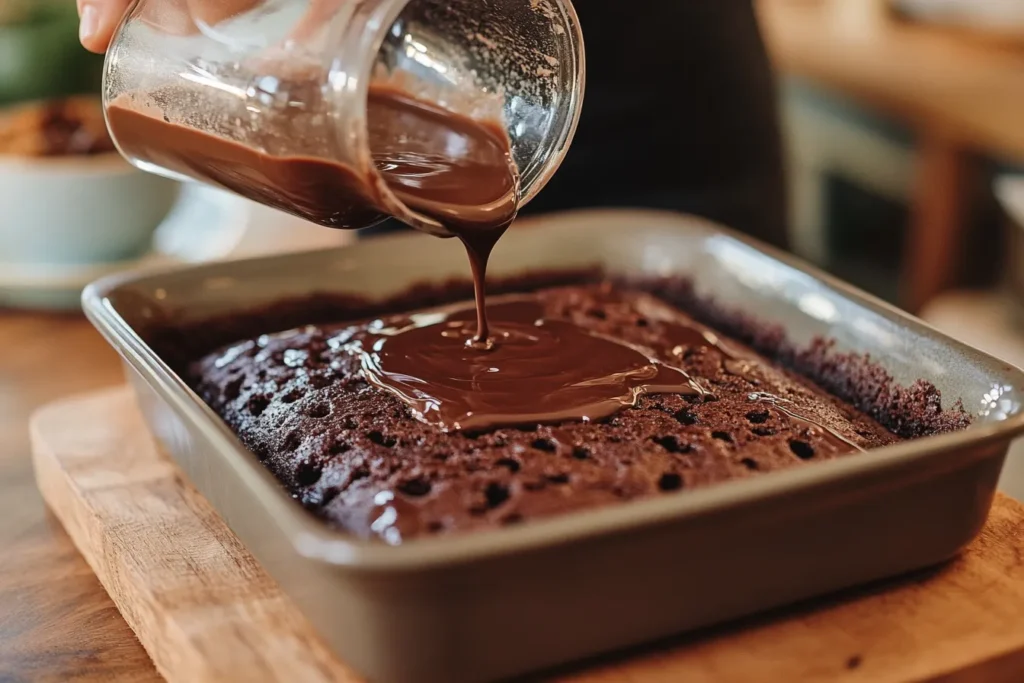
Step 2: The Crucial Poke Technique (Don’t Skimp!)
Here comes the fun part – the poking! Grab the round handle of a wooden spoon (or a similar tool, like a thick skewer or even a straw, though the spoon handle often makes perfect-sized holes). Gently but firmly, poke holes all over the surface of the warm cake. Don’t be shy! Space the holes about an inch or so apart. Go down about two-thirds of the way into the cake – you want deep enough reservoirs for the filling but don’t poke all the way through to the bottom. Cover the entire cake surface evenly with holes. This network of tunnels is what allows the filling to seep deep into the cake, creating those pockets of gooey goodness. ✨
Step 3: Flooding the Gates – Adding the Filling
Now, prepare your chosen chocolate filling while the cake is still warm (but not piping hot).
- If using pudding: Prepare the instant pudding according to package directions (maybe use slightly less milk for a thicker result) or heat the cook-and-serve type.
- If using sweetened condensed milk: Gently heat the condensed milk and chocolate chips in a saucepan over low heat, stirring constantly until the chips are melted and the mixture is smooth. Be careful not to scorch it! If it seems too thick to pour easily, stir in a tablespoon or two of milk or cream.
Once your filling is ready and still warm/pourable, slowly and evenly pour it all over the top of the poked cake. Use a spatula or the back of a spoon to gently spread the filling, encouraging it to sink into those holes. You want to saturate the cake thoroughly. It might look like a lot of liquid, but trust the process – the warm cake will soak it up like a dream! 😋
Step 4: Chilling Out – Letting the Magic Happen
This step requires patience, but it’s crucial! Once the filling is poured, cover the cake pan loosely with plastic wrap or foil and place it in the refrigerator. Let it chill for at least 2-4 hours, but overnight is even better. Why? This chilling time allows the filling to fully set up within the cake holes and lets the flavors meld together beautifully. It also ensures the cake is completely cool before you attempt to frost it. Trying to frost a warm or even room-temperature poke cake often leads to a melty, messy disaster. Cold cake = happy frosting! 🥶➡️🎂
Step 5: Frosting Frenzy and Topping Temptation
Once the cake is thoroughly chilled and the filling has set, it’s time for the grand finale! Prepare your chosen chocolate frosting (buttercream, cream cheese, ganache – whatever you decided on). Spread the frosting evenly over the top of the chilled cake. You can get fancy with swirls or keep it smooth and simple.
Now, unleash your creativity with the toppings! Sprinkle generously with chocolate chips, chocolate shavings, crushed cookies, chopped candy bars, or a final drizzle of chocolate or caramel sauce. Make it look as explosive and decadent as it sounds! This is your moment to make it truly yours. 🥳
Navigating the Chocolate Minefield: Common Problems & Solutions
Even seasoned bakers encounter hiccups sometimes! Don’t panic if your Death by Chocolate Poke Cake Explosion hits a minor snag. Here’s how to troubleshoot some common issues: 🤔💡
Disaster Zone 1: The Dreaded Dry Cake
- Problem: The cake base itself, before adding the filling, seems dry or crumbly.
- Cause: Overbaking, incorrect ingredient measurements, or maybe just a finicky recipe.
- Solution: The good news? Poke cakes are forgiving! The filling adds a ton of moisture. Ensure you poked plenty of holes and the filling soaked in well. If you used a box mix, next time try adding an extra egg yolk or using melted butter instead of oil. If baking from scratch, double-check your measurements and baking time. A slightly drier cake base can actually soak up the filling even better sometimes!
Disaster Zone 2: Soggy Bottom Blues
- Problem: The bottom of the cake is wet or mushy.
- Cause: Poking holes too deep (all the way through), using way too much filling, or the filling being too thin and pooling at the bottom instead of being absorbed.
- Solution: Be mindful of your poking depth next time – aim for 2/3rds of the way down. Ensure your filling isn’t watery; if using pudding, use slightly less liquid. If using condensed milk sauce, make sure it’s thickened nicely. Let the cake cool slightly (15-20 min) before poking and pouring; a slightly cooled cake structure holds up better than one straight from the oven.
Disaster Zone 3: Filling Fails (Too Thick/Thin/Not Absorbing)
- Problem: The filling is either too thick to sink in, too thin and runny, or just sits on top.
- Cause: Incorrect filling consistency, cake being too cool when filling was added.
- Solution:
- Too Thick: Gently warm the filling slightly or whisk in a tiny bit more milk/cream until it’s pourable but still rich.
- Too Thin: If it’s a pudding base, ensure you used the right milk ratio (or slightly less). If it’s a sauce, maybe simmer it a bit longer (carefully!) to thicken, or add a few more chocolate chips.
- Not Absorbing: Make sure the cake is still warm (not hot, not cold) when you pour the filling. Warm cake is more receptive. Ensure you poked enough holes! You can gently use the back of a spoon to coax the filling towards the holes.
Disaster Zone 4: Frosting Fiascos
- Problem: Frosting is melting off, too stiff to spread, or looks grainy.
- Cause: Cake not fully chilled, frosting ingredients wrong temperature, improper mixing.
- Solution:
- Melting: Your cake MUST be completely cold. Pop it back in the fridge if needed. Also, ensure your kitchen isn’t too hot.
- Too Stiff: Add more liquid (milk/cream) one teaspoon at a time, beating well after each addition, until spreadable.
- Too Thin/Runny: Add more powdered sugar, a few tablespoons at a time, beating well. Chilling the frosting briefly can also help it firm up.
- Grainy (Buttercream): Often caused by undissolved sugar or cold butter. Make sure butter is properly softened (not melted). Sift your powdered sugar. Beat it longer! Sometimes just letting the mixer run for a few extra minutes smooths things out.
Beyond the Blast: Fun Variations and Customizations
While the classic Death by Chocolate is amazing, don’t be afraid to experiment! ✨
White Chocolate Wonders & Mocha Madness
- White Chocolate Dream: Use a white cake mix, poke and fill with a white chocolate pudding or a heated mixture of sweetened condensed milk and white chocolate chips. Frost with white chocolate buttercream or cream cheese frosting and top with white chocolate shavings.
- Mocha Twist: Use a chocolate cake mix, but dissolve a tablespoon or two of instant espresso powder in the warm filling liquid (pudding milk or condensed milk mixture). Frost with chocolate or espresso-flavored buttercream. Coffee and chocolate are a match made in heaven! ☕🍫
Adding Crunch and Chew: Nuts, Chips, and Candies
- Nutty Delight: Fold chopped toasted pecans or walnuts into the cake batter or sprinkle them generously on top.
- Candy Bar Craze: Use chopped Heath bars, Reese’s Peanut Butter Cups, Snickers, or Butterfingers as your topping. Some can even be folded into the frosting.
- Texture Mix-Up: Add mini marshmallows, caramel bits, or shredded coconut to the toppings for different textures and flavors.
Serving Your Chocolate Masterpiece: Presentation is Key
You’ve baked this incredible cake, now show it off! 🍽️ Cut generous squares – you can often see the lovely filling stripes inside. A dollop of whipped cream or a scoop of vanilla bean ice cream alongside is never a bad idea, helping to cut through the richness slightly. Dusting the plate with a little extra cocoa powder or adding a fresh raspberry can make it look extra fancy.
Storing the Sweetness: Keeping Your Cake Fresh (If It Lasts!)
Because of the dairy-based filling and frosting, this cake must be stored in the refrigerator. Keep it tightly covered with plastic wrap or in an airtight container. It generally stays moist and delicious for 3-4 days (though the toppings might soften slightly over time). Honestly, the biggest challenge is usually making it last that long! 😉🤫
Why This “Explosion” is Worth Every Single Calorie
Let’s be honest, this cake is the definition of indulgence. It’s not health food. But sometimes, you need a dessert that’s pure, unadulterated comfort and joy.
“Cooking is like love. It should be entered into with abandon or not at all.” – Harriet Van Horne
This Death by Chocolate Poke Cake Explosion embodies that spirit of delicious abandon. It’s rich, it’s decadent, it’s outrageously chocolatey, and it’s guaranteed to make people happy. It’s more than just a cake; it’s an experience, a celebration, a moment of pure, blissful indulgence. So go ahead, bake it, share it (or don’t!), and savor every single bite. You’ve earned it! 💯🥳🧁
Nutritional Information (Approximate)
Okay, deep breaths everyone! As mentioned, this is pure indulgence. The exact nutritional information will vary wildly depending on the specific cake mix used, the type of frosting, the exact filling ingredients, and the toppings you go for. Think of it as a special occasion treat rather than an everyday snack. A typical slice of such a rich cake can easily contain significant amounts of calories, sugar, and fat. If you need precise information, using an online recipe nutrition calculator and inputting your exact ingredients and quantities would be the most accurate approach. But for today? Let’s just focus on the deliciousness. 😉