
Introduction
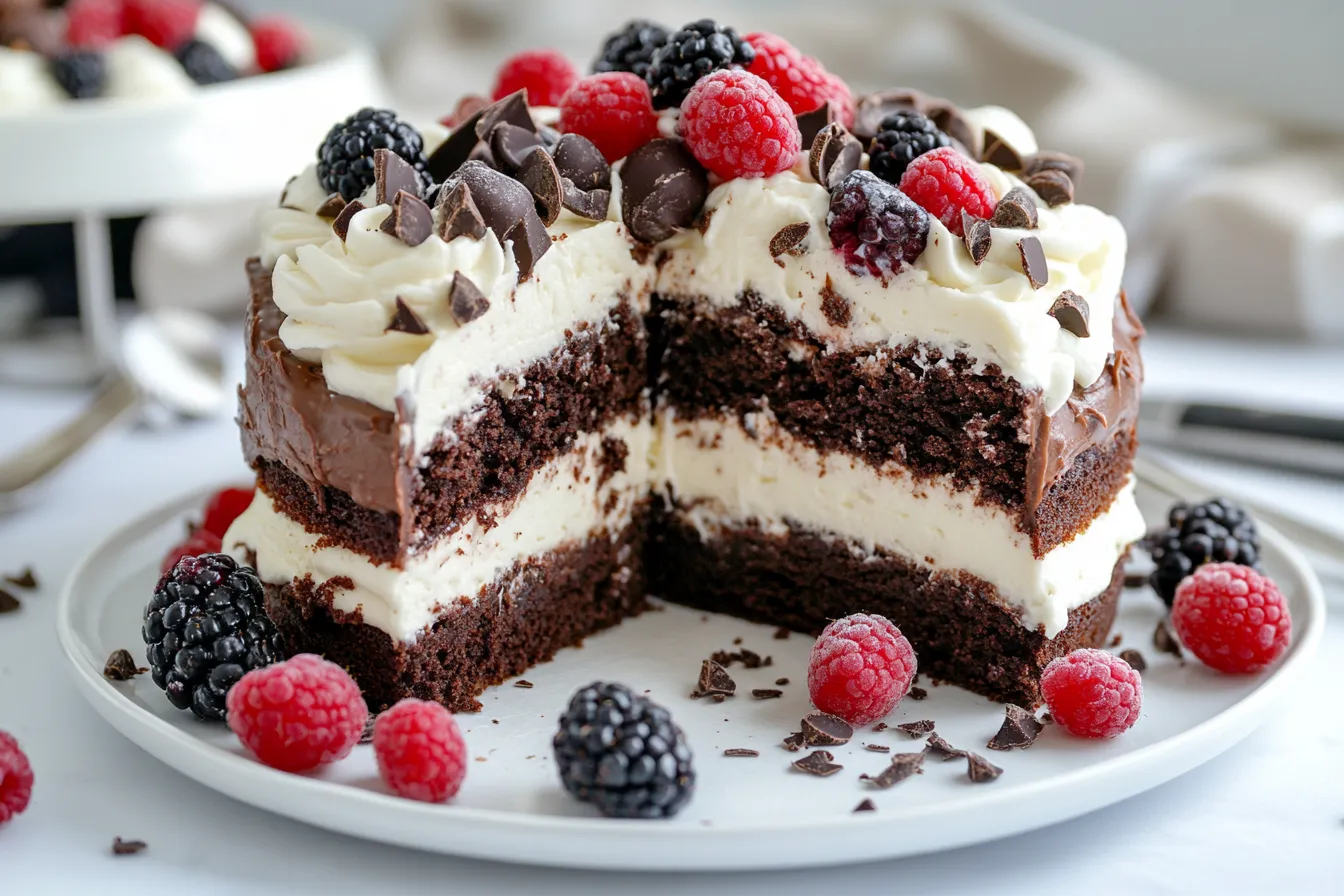
If you’re hunting for a show-stopping dessert that’s indulgent, effortless, and doesn’t require an oven, look no further. This brownie refrigerator cake recipe is your new secret weapon for last-minute parties, family gatherings, or just satisfying those weeknight chocolate cravings. It combines the fudgy goodness of brownies with a light, creamy filling – all layered and chilled to perfection.
This no-bake dessert has become a fan favorite, and for good reason. It’s fast, it’s easy, and it’s guaranteed to impress. With just a few simple ingredients and a bit of fridge time, you’ll have a decadent treat ready to serve. Plus, it’s completely customizable with your favorite toppings, from fresh berries to crushed nuts and chocolate drizzle..Not Yo Mama’s Banana Pudding Recipe
Whether you’re an experienced baker or a beginner looking for a foolproof dessert, this recipe is bound to be your go-to. Let’s dive into the details and find out why everyone’s raving about this creamy, chilled brownie cake.
Why You’ll Love This Brownie Refrigerator Cake
Perfect for Every Occasion
One of the greatest advantages of this brownie refrigerator cake recipe is its versatility. It fits into just about any event – from a casual potluck to an elegant dinner party. It looks and tastes impressive, yet it comes together with minimal effort.
No Oven Needed
This is a no-bake recipe, which means you can keep your kitchen cool, especially during the hot summer months. It’s also perfect for those who don’t own an oven or simply want a quick dessert that won’t heat up the whole house.
Easy to Customize
You can get creative with this recipe. Swap the base for gluten-free brownies, add peanut butter or Nutella to the cream layer, or top with seasonal fruits and chocolate shavings. The possibilities are endless, making it ideal for anyone with dietary preferences or seasonal tastes..Delightful Cheesecake Fondue
Crowd-Pleaser
Thanks to its rich chocolate flavor and creamy texture, this dessert appeals to both kids and adults alike. Whether you’re bringing it to a picnic or serving it as a weekend treat, expect compliments and empty plates.
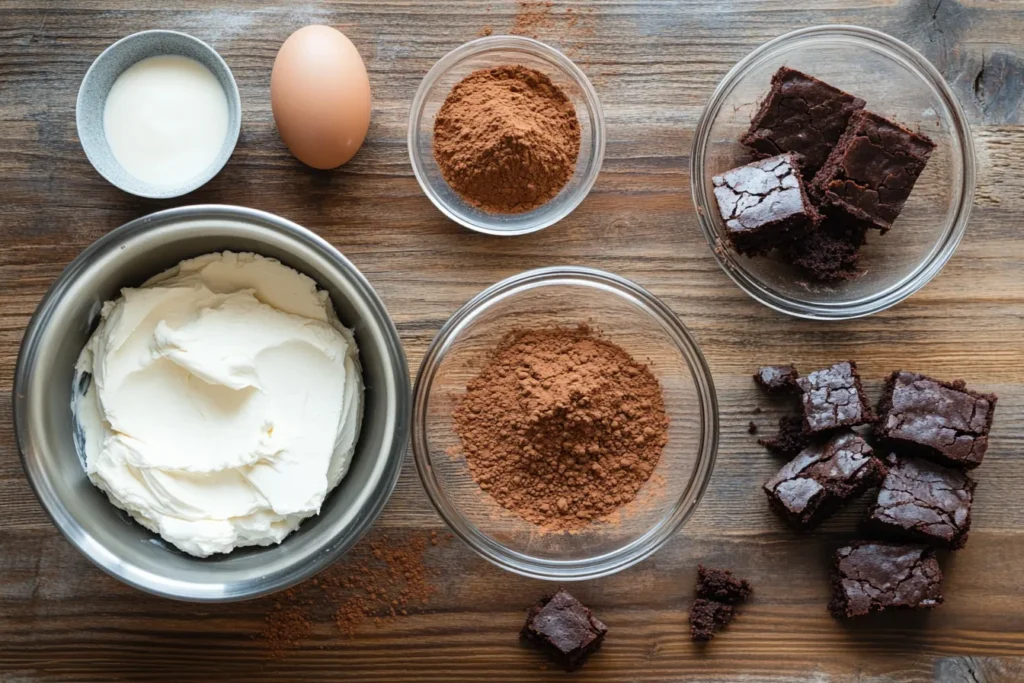
Ingredients You Need
Creating this delicious brownie refrigerator cake doesn’t require complicated tools or hard-to-find ingredients. With a few pantry staples and some refrigerator time, you’ll have a beautiful, layered dessert that looks as good as it tastes.
For the Brownie Base
To start, you’ll need a solid, fudgy brownie layer. You can either use homemade brownies, a boxed mix, or store-bought brownies if you’re in a hurry. Here’s what you’ll need for a homemade version:
- 1/2 cup (1 stick) unsalted butter, melted
- 1 cup granulated sugar
- 2 large eggs
- 1 tsp vanilla extract
- 1/3 cup unsweetened cocoa powder
- 1/2 cup all-purpose flour
- 1/4 tsp salt
- 1/4 tsp baking powder
Tip: Want to skip the baking entirely? Use pre-baked brownies or chocolate cake layers from your local store.
For the Cream Filling
The creamy, chilled filling is what takes this dessert to the next level. It’s a combination of whipped cream, cream cheese, and sugar – giving it a mousse-like consistency without much effort.
- 1 package (8 oz) cream cheese, softened
- 1/3 cup powdered sugar
- 1 tsp vanilla extract
- 1 1/2 cups heavy whipping cream (chilled)
- Optional: 1 tbsp cocoa powder (for a chocolate mousse twist)
Toppings (Optional but Recommended)
Dress up your brownie refrigerator cake with any of these popular toppings:
- Crushed chocolate cookies
- Chopped nuts (like pecans or walnuts)
- Fresh berries (strawberries, raspberries, blueberries)
- Shaved chocolate or chocolate chips
- Caramel or chocolate syrup drizzle
Step-by-Step Instructions
Now that you have your ingredients ready, let’s walk through the steps to assemble this easy refrigerator dessert.
Step 1 – Prepare the Brownie Layer
If you’re using a boxed brownie mix or homemade batter, follow the instructions and bake in a rectangular pan. Once baked and fully cooled, crumble the brownie into chunks or cut into squares that will form the base of your cake. Press the pieces into the bottom of a lined 9×9 inch pan to create a flat base.
No-Bake Tip: Use pre-cooked brownies or even chocolate graham crackers for an entirely no-bake version.
Step 2 – Whip the Cream Layer
In a large bowl, beat the softened cream cheese with powdered sugar and vanilla extract until smooth and creamy. In a separate chilled bowl, whip the heavy cream until stiff peaks form. Gently fold the whipped cream into the cream cheese mixture. You should get a light and airy mousse-like filling.
Optional Twist: For chocolate lovers, add cocoa powder into the cream filling for a richer flavor.
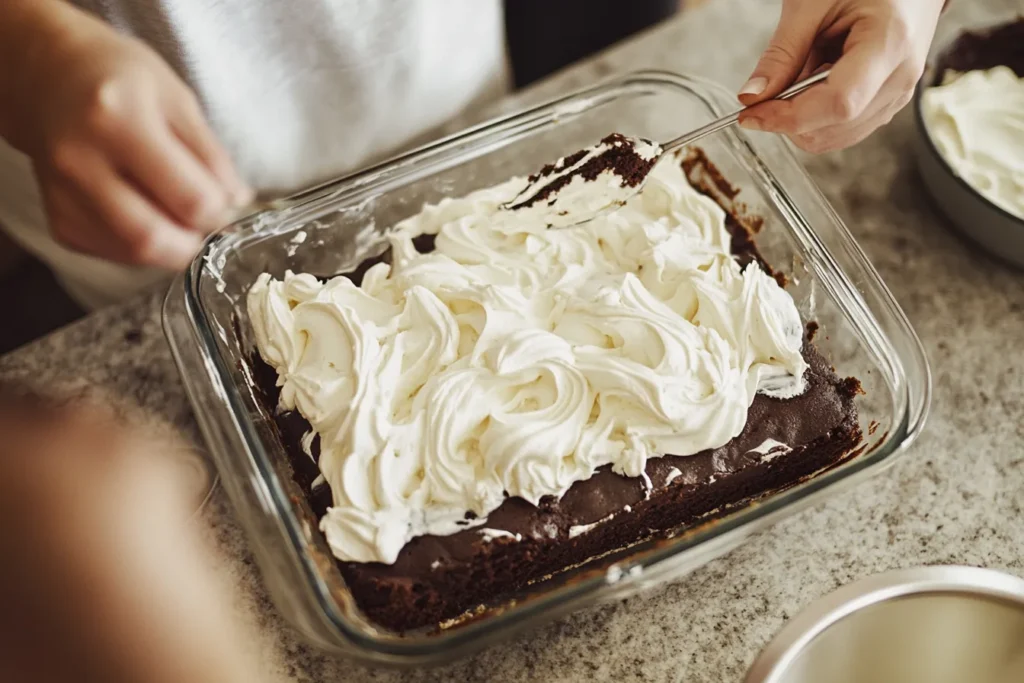
Step 3 – Assemble the Layers
Spread half of the cream mixture evenly over the brownie base. Add a second layer of brownie pieces, then top with the remaining cream. Use a spatula to smooth the surface.
Step 4 – Chill to Set
Cover the dish with plastic wrap and refrigerate for at least 4 hours, preferably overnight. This step is crucial, as it helps the layers to firm up and allows the flavors to blend beautifully.
Step 5 – Garnish and Serve
Just before serving, add your favorite toppings. A handful of fresh berries or a drizzle of chocolate sauce can elevate the look and flavor. Slice into squares or bars and enjoy your cold, creamy dessert.
Tips & Tricks for the Perfect Refrigerator Cake
Even though this brownie refrigerator cake recipe is pretty foolproof, a few insider tips can help elevate your dessert from great to unforgettable. These practical tricks ensure a flawless texture, flavor, and presentation every time..Ultimate Fudgy Brownie Recipe
Use High-Quality Chocolate
Whether you’re baking your own brownies or using pre-made ones, the quality of your chocolate makes a big difference. Look for rich, semi-sweet chocolate or Dutch-processed cocoa powder for the best depth of flavor. Avoid overly sweet chocolate, as the cream layer adds plenty of sweetness already.
Don’t Overbeat the Cream
When whipping heavy cream, it’s important to stop as soon as stiff peaks form. Overbeating can lead to a grainy texture or even turn the cream into butter. Use a chilled bowl and whisk for the best results.
Line the Pan for Easy Removal
To get clean, sharp slices, line your pan with parchment paper, leaving a bit of overhang on the sides. This will help you lift the cake out easily once it’s chilled and set.
Let It Chill Fully
Rushing the chilling process is the most common mistake. The longer your brownie refrigerator cake chills, the firmer and tastier it becomes. A minimum of 4 hours is needed, but overnight chilling gives the best results. It also allows the brownie base to absorb some moisture from the cream, resulting in a moist, fudgy texture.
Slice with a Warm Knife
For perfect, clean edges, dip your knife in warm water and wipe it dry before slicing. Repeat between cuts. This simple trick prevents the cream from sticking and ensures a neater presentation.
Variations & Flavor Twists
The beauty of this recipe lies in its adaptability. Once you’ve mastered the basic brownie refrigerator cake, you can switch things up to match the season, dietary preferences, or your personal cravings.
Nutty Brownie Refrigerator Cake
Add chopped walnuts, almonds, or hazelnuts to the brownie base for added crunch. Sprinkle toasted nuts on top for an elegant finish.
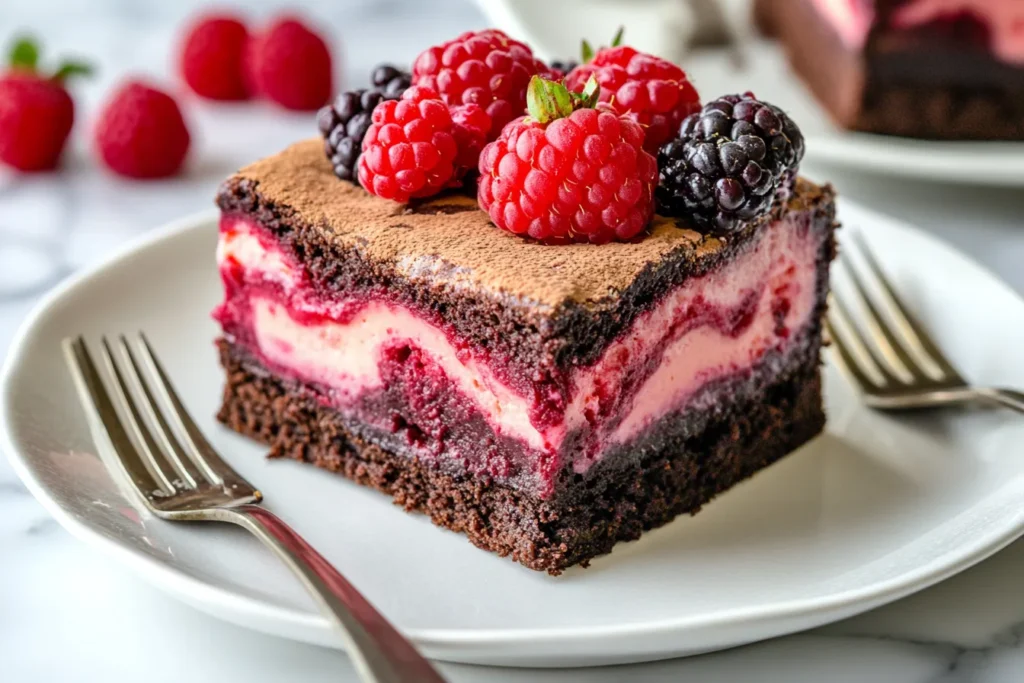
Berry Swirl Version
Fold a swirl of raspberry or strawberry jam into the cream filling before layering. The tartness of the berries cuts through the richness and adds a fruity surprise in every bite.
Mint Chocolate Variation
Add 1/2 tsp of mint extract to the cream filling and top the cake with crushed mint candies or Andes chocolate pieces. It’s a refreshing twist that’s perfect for holidays or summer.
Mocha Espresso Kick
Add 1 tbsp of espresso powder to the brownie mix or the cream layer. Coffee intensifies the chocolate flavor and gives the cake a sophisticated edge.
Vegan and Dairy-Free Adaptation
For a plant-based version, use dairy-free brownies (made with almond milk or coconut oil), swap the cream cheese for a vegan alternative, and whip full-fat coconut cream instead of dairy cream.
Make-Ahead, Storage & Freezing Guidelines
One of the standout qualities of a brownie refrigerator cake is how well it stores and travels. It’s a make-ahead dream and perfect for stress-free entertaining.
Make-Ahead Instructions
This dessert is actually better when made ahead of time. The layers need time to chill and meld together, which enhances the flavor and texture. You can easily prepare it the night before, or even up to two days in advance.
Simply assemble the cake, cover it tightly with plastic wrap or an airtight lid, and refrigerate until ready to serve. Just be sure to add fresh toppings right before serving for the best presentation and taste.
Storage Tips
Once assembled, the brownie refrigerator cake should be kept chilled. Store leftovers in the refrigerator for up to 5 days. Use a sealed container to prevent the cream layer from absorbing odors from other foods.
Pro Tip: If you’re slicing the cake in advance, separate slices with parchment paper to maintain their shape and avoid sticking.
Freezing Instructions
Yes, you can freeze this cake! While it’s best enjoyed fresh, you can freeze it for up to 2 months:
- Assemble the cake as usual, but avoid adding any toppings.
- Wrap the entire pan tightly with plastic wrap, followed by a layer of foil.
- Thaw in the refrigerator overnight before serving.
- Add fresh toppings after thawing.
This makes it a great option for preparing in bulk or saving leftover slices.
Serving Suggestions & Pairings
This brownie refrigerator cake is delicious on its own, but pairing it with complementary flavors or beverages takes it to a whole new level.
With Fresh Fruit
Serve each slice with a few fresh raspberries or sliced strawberries. The natural tartness helps balance the rich chocolate and cream.
Ice Cream on the Side
For a next-level dessert experience, plate your cake with a scoop of vanilla or mint chocolate chip ice cream. The cold creaminess works beautifully with the chewy brownie texture.
Beverages That Match
This cake goes well with:
- Freshly brewed coffee or espresso
- Iced latte or cold brew
- A glass of cold milk
- Dessert wine or sweet liqueur like Kahlúa

Why It’s Trending in 2025
Dessert Trends Favor Easy, No-Bake Options
According to major food platforms and search engine trends, people in 2025 are leaning into comfort desserts that are simple, nostalgic, and customizable. No-bake treats like this brownie refrigerator cake hit all those marks. It’s stress-free, highly shareable on social media, and doesn’t require any fancy equipment.
Instagram-Ready and Shareable
Layered desserts are visually appealing and perfect for food photography. With minimal effort, you can create a dessert that looks gourmet and is ready to post on Instagram or Pinterest.
Versatility Wins in Modern Kitchens
Today’s home cooks want recipes that can adapt to different tastes and diets. This brownie refrigerator cake can be made gluten-free, vegan, nut-free, or ultra-decadent—making it a favorite in modern kitchens across the globe.
Frequently Asked Questions
Can I use store-bought brownies for this recipe?
Absolutely! Store-bought brownies are a great time-saver and work wonderfully in this recipe. Just be sure they are soft and fudgy for the best texture. Cut them into chunks or crumble them to form the base.
Can I freeze the brownie refrigerator cake?
Yes, this dessert freezes well for up to 2 months. Wrap it tightly with plastic wrap and foil. When ready to serve, thaw overnight in the refrigerator. For the best taste, add any fresh toppings after thawing.
Can I make it gluten-free?
Definitely. Use a gluten-free brownie recipe or mix for the base and ensure all other ingredients are certified gluten-free. The cream filling is naturally gluten-free.
How long does it need to chill?
The cake should chill for at least 4 hours, but overnight chilling gives the best results. This allows the layers to set and flavors to meld for that perfect texture.
What’s the difference between a refrigerator cake and an icebox cake?
They’re very similar! Both are no-bake desserts layered with creamy fillings and chilled until firm. Icebox cakes typically use cookies or graham crackers, while refrigerator cakes often use brownies, cakes, or more decadent bases.
Can I make it vegan?
Yes! Use vegan brownies, a plant-based cream cheese alternative, and full-fat coconut cream in place of heavy cream. You’ll still get a rich, delicious dessert with no animal products.
Conclusion
There’s something magical about a dessert that requires no baking, minimal prep, and delivers maximum flavor. This brownie refrigerator cake recipe hits every sweet spot: rich chocolate, velvety cream, and the cool, refreshing finish that’s perfect for any season.
Whether you stick to the classic version or get creative with your own flavor twist, this no-bake treat is sure to impress. It’s ideal for busy home cooks, beginner bakers, and anyone craving something delicious without spending hours in the kitchen.
So the next time you need a crowd-pleasing dessert or simply want to indulge in something decadent, reach for this recipe. And don’t forget to snap a photo before it disappears—this cake is as photogenic as it is tasty!

Name: Brownie Refrigerator Cake Recipe
Ingredients
Equipment
Method
- Instructions:
- Prepare the Brownie Base:
- Bake brownies using your preferred method. Once cooled, cut or crumble into chunks. Press into the bottom of a lined 9×9 inch dish to form a flat base.
- Make the Cream Layer:
- In a bowl, beat softened cream cheese with powdered sugar and vanilla until smooth. Separately, whip the heavy cream until stiff peaks form. Gently fold whipped cream into the cream cheese mixture.
- Assemble the Cake:
- Spread half the cream over the brownie layer, add another layer of brownie chunks, and then top with remaining cream. Smooth the top.
- Chill:
- Refrigerate for at least 4 hours or overnight until set.
- Add Toppings & Serve:
- Before serving, top with your choice of garnishes. Slice and enjoy chilled.