
Introduction
If you’re craving a bowl of smooth, rich vanilla ice cream but want to skip the dairy, you’re in luck. Dairy free vanilla ice cream has become a must-have for anyone who is lactose intolerant, vegan, or simply looking for a lighter, plant-based alternative. Thanks to modern dairy-free milks and natural sweeteners, it’s easier than ever to whip up a delicious treat that rivals traditional ice cream in both taste and texture.
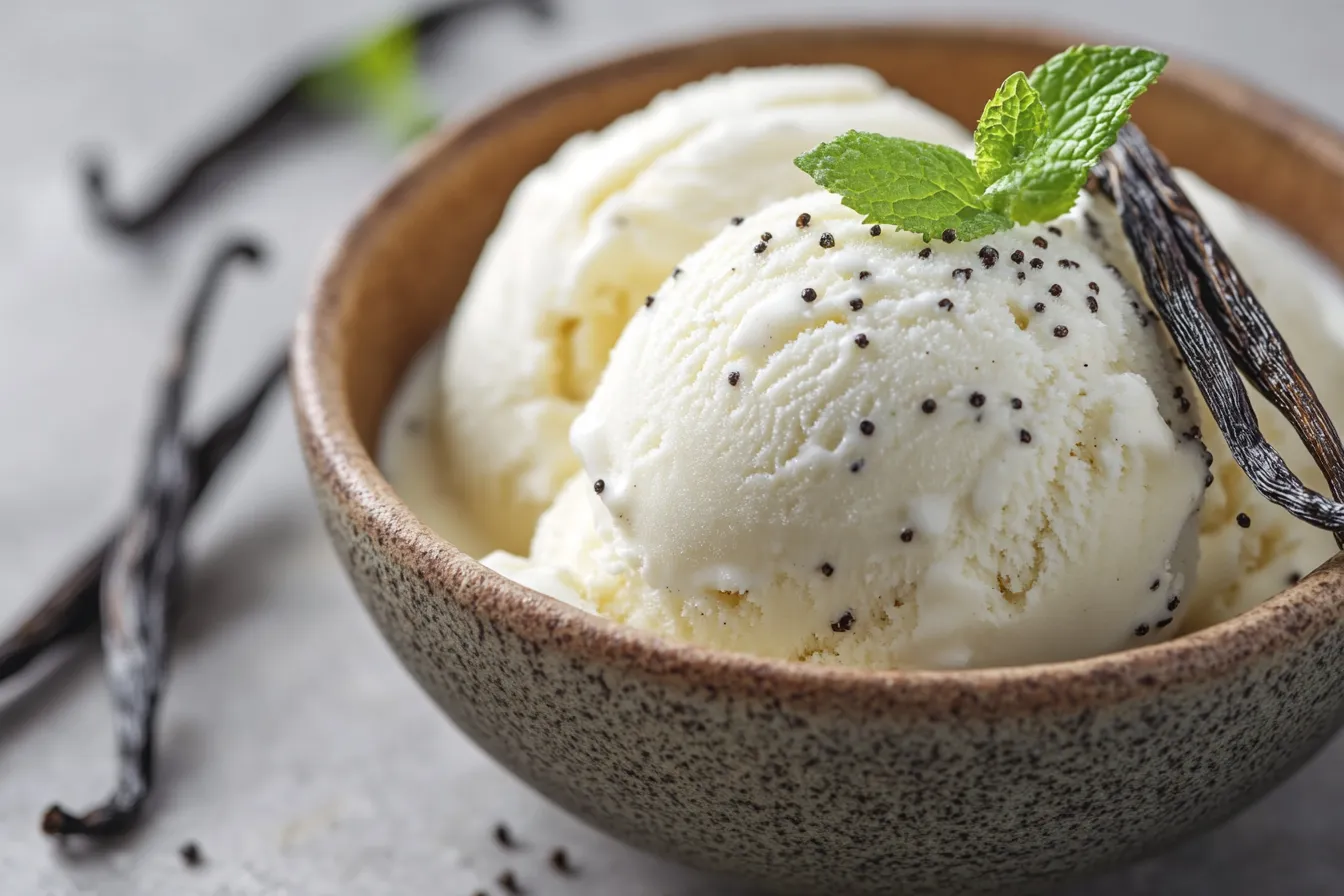
In this ultimate guide, you’ll discover how to make the best dairy free vanilla ice cream right at home. We’ll cover everything — from the healthiest dairy-free ingredients to step-by-step methods, flavor options, and expert tips to get that creamy, dreamy consistency everyone loves. So grab a spoon and get ready to dive into a guilt-free dessert that’s as good for your taste buds as it is for your health..Vanilla and Chocolate Ice Cream
Why Choose Dairy Free Vanilla Ice Cream?
Health Benefits
Choosing dairy free vanilla ice cream isn’t just a trend; it’s a lifestyle choice with real benefits. Many people experience bloating, discomfort, or digestive issues after eating traditional dairy ice cream because it’s high in saturated fat and lactose. By switching to a dairy-free version, you can still enjoy a refreshing dessert while reducing inflammation, avoiding hormones sometimes found in dairy products, and cutting down on saturated fat.
Plant-based ice creams often use ingredients like coconut milk, almond milk, or oat milk, which deliver healthy fats and essential nutrients. These ingredients can support heart health, provide antioxidants, and help maintain a healthy gut. Plus, most dairy-free ice creams skip the artificial stabilizers that sometimes sneak into store-bought brands, making them a cleaner, more wholesome treat.
Lactose Intolerance Considerations
Lactose intolerance affects an estimated 68% of the world’s population, meaning a majority of people have trouble digesting lactose, the sugar found in cow’s milk. Symptoms like cramping, diarrhea, and gas are not only uncomfortable but also completely avoidable with a dairy-free dessert. Dairy free vanilla ice cream is an ideal alternative because it captures the creamy, sweet flavor of traditional ice cream without the digestive consequences.
By using plant-based milks and natural sweeteners, you can eliminate the lactose problem entirely and still satisfy your ice cream cravings. It’s a win-win for your gut and your taste buds.
Ingredients You’ll Need
Before you start churning, you’ll need a simple list of ingredients to make the perfect dairy free vanilla ice cream. The beauty of this recipe is how flexible it is — you can customize it to your dietary needs or flavor preferences..Low Calorie Ice Creams
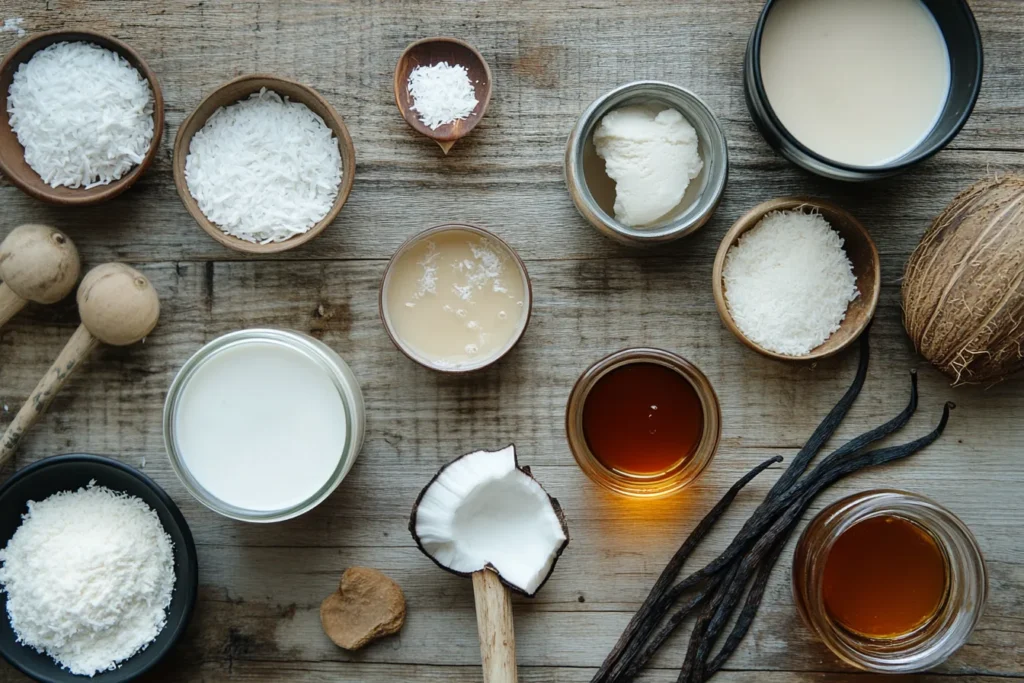
Best Dairy-Free Milk Alternatives
The most important part of your dairy-free ice cream is the milk alternative. Here are a few of the best options to create a creamy, delicious base:
- Coconut Milk: Full-fat coconut milk is a favorite for its rich, creamy texture and subtle coconut undertones that complement vanilla beautifully.
- Oat Milk: Creamy, slightly sweet, and neutral in flavor, oat milk is an excellent base for a lighter ice cream.
- Almond Milk: Lower in calories and light on flavor, almond milk can work well if you add a bit more fat, like coconut cream, to keep things smooth.
- Cashew Milk: Naturally creamy and mild, cashew milk is another great choice for a silky vanilla ice cream.
Sweeteners & Flavor Enhancers
To keep things naturally sweet, skip refined sugars and try these alternatives:
- Maple syrup: Offers a deep, caramel-like sweetness
- Agave nectar: Subtle and smooth
- Coconut sugar: Low-glycemic with a hint of toffee flavor
And of course, don’t forget pure vanilla extract — it’s the star of the show. Look for a high-quality extract or even real vanilla bean for the richest, most authentic flavor.
Step-by-Step Dairy Free Vanilla Ice Cream Recipe
Making dairy free vanilla ice cream at home might sound intimidating, but it’s surprisingly simple if you follow a proven method. Here’s a detailed, step-by-step guide to creating your own creamy, dreamy dessert without dairy.
Preparing the Base
- Gather Your Ingredients
You’ll need:- 2 cans of full-fat coconut milk (or another milk alternative of your choice)
- ½ cup maple syrup (or sweetener of choice)
- 2 teaspoons pure vanilla extract (or the seeds of one vanilla bean)
- Pinch of sea salt
- Combine & Blend
In a large mixing bowl, combine all the ingredients. If you’re using vanilla bean, split the pod and scrape out the seeds, adding them directly to the mixture. Use a whisk or a high-powered blender to blend until completely smooth and frothy. Blending ensures the fats from the coconut milk or other plant-based milk emulsify perfectly, giving you a creamy texture later on. - Taste Test
Don’t skip this step! Taste your mixture before chilling. Depending on your preference, you might want to add a bit more vanilla, sweetener, or even a touch of cinnamon for a unique twist. - Chill the Mixture
Place your mixture in the fridge for at least 2 hours, or overnight if you have time. Chilling helps the flavors meld and ensures it churns into a smooth ice cream without ice crystals forming.
Churning & Freezing Tips
Once your mixture is fully chilled, it’s time to churn.
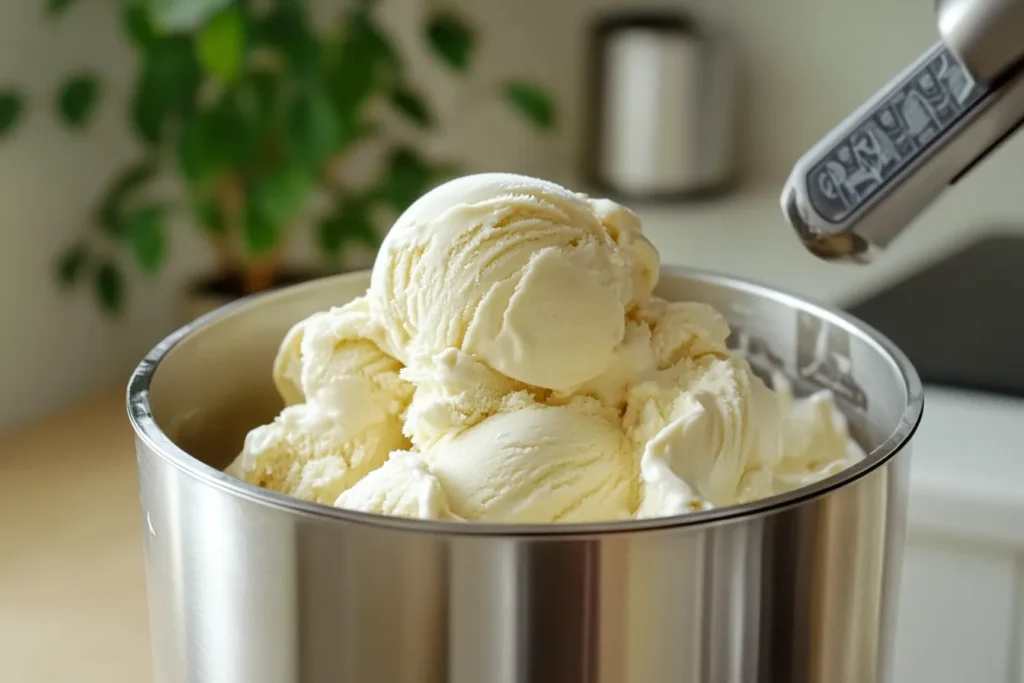
- Use an Ice Cream Maker
Pour your chilled base into your ice cream maker and churn according to the manufacturer’s directions. Typically, this takes about 20–30 minutes until you see a thick, soft-serve consistency. - No Ice Cream Maker? No Problem.
If you don’t have an ice cream maker, pour the chilled mixture into a freezer-safe container. Every 30–45 minutes, stir the mixture vigorously with a fork or whisk to break up ice crystals until frozen (about 4 hours total). - Freeze for Scoopable Texture
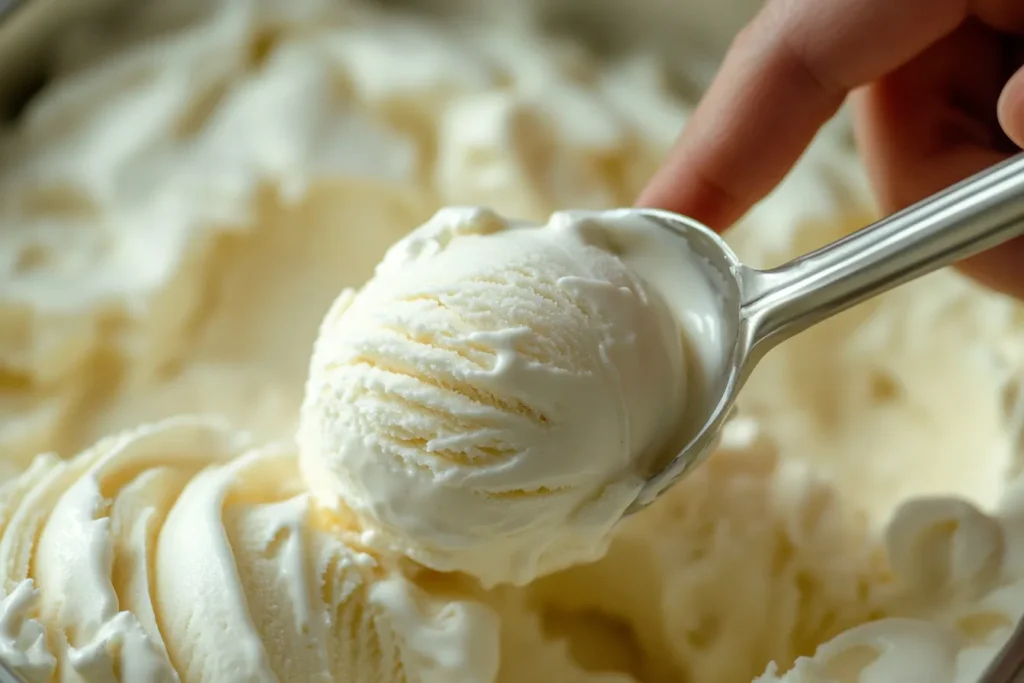
Once churned, transfer your ice cream to a lidded freezer container and freeze for at least 2 more hours to firm up. Before serving, allow it to sit at room temperature for 5–10 minutes to soften, making it easier to scoop.
Tips for Creamy Dairy-Free Ice Cream
Avoiding Icy Texture
Plant-based ice creams can sometimes turn icy because they have a higher water content than traditional dairy. Here’s how to fix that:
- Always use full-fat coconut milk or add coconut cream for extra richness
- Blend your mixture thoroughly to emulsify the fats
- Don’t skip the chill time before churning
- Store ice cream in an airtight container with plastic wrap pressed to the surface to prevent ice crystals
Flavor Variations You Can Try
Once you master the basic vanilla, the sky’s the limit! Here are a few fun variations:
- Chocolate swirl: Gently fold in melted vegan chocolate after churning
- Berry burst: Add fresh or frozen raspberries, strawberries, or blueberries
- Nutty caramel: Swirl in dairy-free caramel sauce and crushed toasted pecans
- Cookie crumble: Stir in crushed gluten-free or vegan cookies for a cookies-and-cream vibe
Serving Suggestions
Toppings and Mix-ins
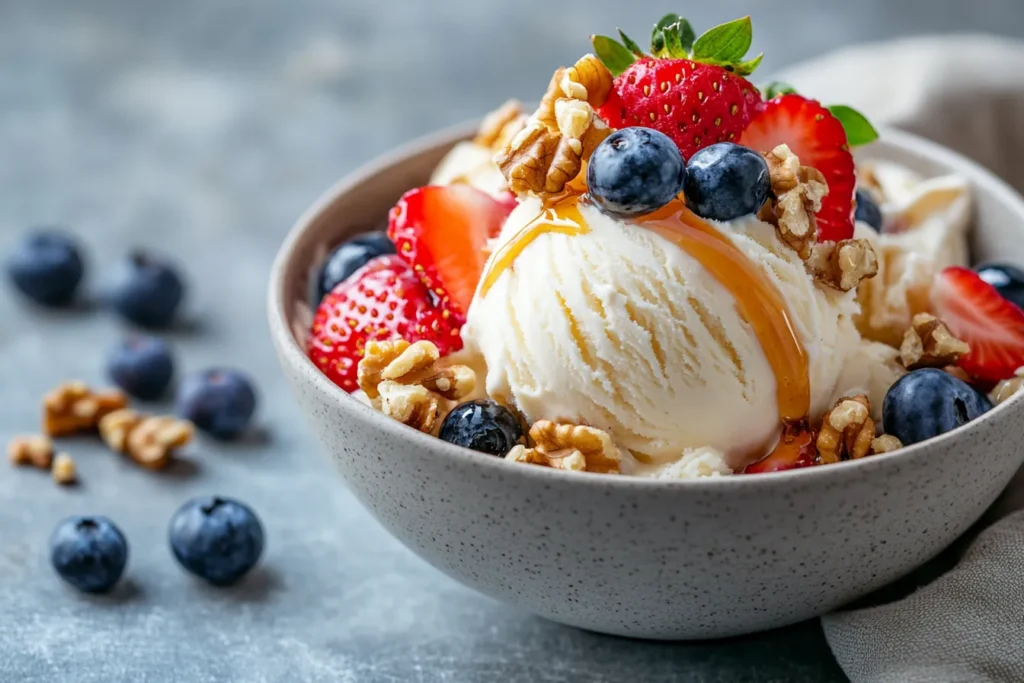
Homemade dairy free vanilla ice cream is a blank canvas for creative toppings and mix-ins. Here are some delicious options:
- Vegan chocolate chips
- Fresh fruits like sliced bananas or strawberries
- Toasted coconut flakes
- Chopped roasted nuts
- A drizzle of peanut butter or almond butter
- Plant-based sprinkles for extra fun
You can even serve it between two vegan cookies for a classic ice cream sandwich or blend a scoop with dairy-free milk to make a delicious milkshake.
Frequently Asked Questions
As more people explore dairy-free alternatives, there are naturally a lot of questions about how to make and store dairy free vanilla ice cream. Here are the answers to some of the most common ones, so you can scoop with confidence.
Can I make this without an ice cream maker?
Absolutely! While an ice cream maker gives the smoothest results, you can still make dairy free vanilla ice cream by using a simple freeze-and-stir method. After preparing and chilling your mixture, pour it into a freezer-safe container. Every 30–45 minutes, stir the mixture with a fork to break up any forming ice crystals. Repeat this process for about 4 hours, and you’ll have a deliciously creamy ice cream without the fancy equipment.
How long does dairy-free ice cream last?
Homemade dairy-free ice cream can last in the freezer for about two weeks. However, because it doesn’t have the stabilizers found in commercial brands, it may become harder over time. To serve, leave it on the counter for 5–10 minutes so it softens up nicely. Always store it in a tightly sealed container, and press parchment paper or plastic wrap directly on the surface to prevent freezer burn and ice crystals.
Is coconut milk the only option?
Not at all! While coconut milk is popular for its creamy texture, you can easily substitute other options like cashew milk, almond milk, oat milk, or soy milk. Just remember, the higher the fat content, the creamier the result. If you use a lower-fat milk, consider adding coconut cream or cashew butter to keep the ice cream rich and satisfying.
Is this ice cream healthy?
Dairy free vanilla ice cream can be a healthier option compared to traditional ice cream because it typically contains fewer saturated fats, no cholesterol, and plant-based nutrients. Plus, if you sweeten it naturally with maple syrup or agave nectar, you’ll avoid refined sugars. As with any dessert, moderation is key, but you can feel good knowing this treat is a lighter, more gut-friendly choice.
Can I add protein powder to it?
Yes! You can absolutely blend in a scoop of plant-based vanilla protein powder for a protein boost. Just keep in mind it might change the flavor slightly, so test with a small amount first. Protein powders can also affect the texture, so you might need to add a bit more plant-based milk if it thickens too much.
Why does my dairy-free ice cream get icy?
This is one of the most common questions. Plant-based milks naturally have higher water content, which leads to iciness if you don’t take a few precautions. Always use full-fat coconut milk or another creamy base, and make sure to chill your mixture thoroughly before churning. Blending well to emulsify the fats, as well as storing with plastic wrap pressed against the surface, will help keep the final result creamy and smooth.
Conclusion
There’s no need to give up your favorite dessert just because you’re going dairy-free. With this easy, customizable dairy free vanilla ice cream recipe, you can enjoy the nostalgic taste of classic vanilla in a healthier, plant-powered way. Whether you follow a vegan diet, manage a lactose intolerance, or simply want a lighter summer treat, this creamy ice cream is the perfect solution.
Ready to create your own? Grab those ingredients, fire up the ice cream maker (or your freezer), and dive into a homemade dessert that’s sure to become a household favorite. Once you taste how simple and satisfying dairy free vanilla ice cream can be, you might never go back to store-bought again.
Name: Dairy Free Vanilla Ice Cream
Ingredients
Equipment
Method
- Instructions:
- In a large bowl, whisk together the coconut milk, maple syrup, vanilla extract, and sea salt until completely smooth and frothy.
- Taste and adjust the sweetness or vanilla to your preference.
- Chill the mixture in the refrigerator for at least 2 hours, or overnight for best results.
- Pour the chilled mixture into an ice cream maker and churn according to the manufacturer’s directions (typically 20–30 minutes) until it reaches a soft-serve consistency.
- No ice cream maker? Pour into a freezer-safe container and stir vigorously every 30–45 minutes for about 4 hours until creamy.
- Transfer the churned ice cream to a lidded container and freeze for at least 2 more hours to firm up.
- Let it soften at room temperature for 5–10 minutes before scooping. Enjoy!